Smash Burger Press Under $30 — Is It Worth It? I Tested Four So You Don’t Have To
My twins asked for burgers three nights in a row last week. By the third night I was tired of forming patties by hand and watching them shrink into dry hockey pucks on the grill. The TikTok smash burger thing has been impossible to avoid for two years now, so I finally caved and bought four cast iron presses to figure out which one actually works.
Here’s the verdict after a week of greasy testing: yes, the technique is worth it. And no, you do not need to spend $80 on a press. The best one I tested was twenty-two bucks.
Our Top Picks
- Cuisinart 6.5″ Cast Iron Smash Burger Press — Best overall. Heavy enough, flat-edged, sub-$25. ~$20–$25.
- Bellemain 7″ Cast Iron Burger Press — Best for big patties. Wider face, higher weight. ~$22–$28.
- Lodge 8″ Round Cast Iron Press — Best brand reputation. Spiral cool-grip handle. ~$25–$30.
- Lodge 8″ Round Cast Iron Press — The bigger Lodge for griddle smash sessions. ~$28–$32.
What is a smash burger and why does the press matter?
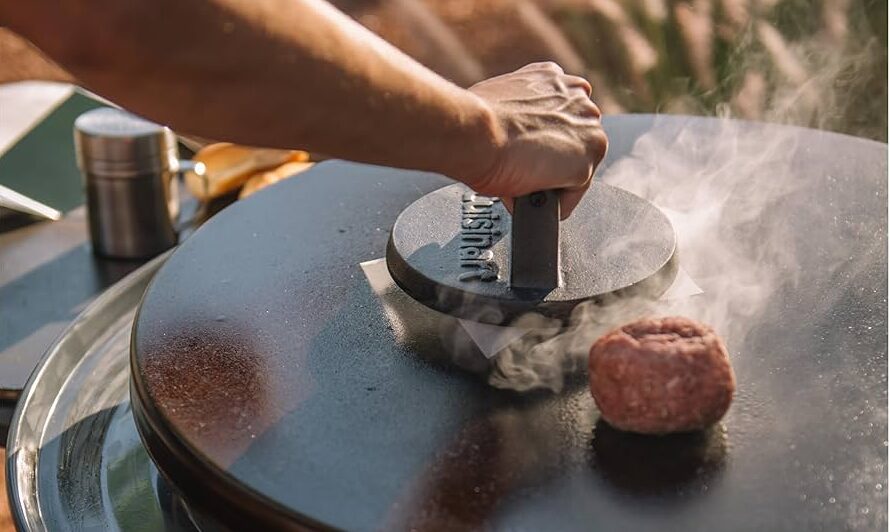
A smash burger is a loose ball of ground beef pressed flat onto a screaming-hot griddle or skillet within five seconds of hitting the surface. The smash creates massive contact area between the meat and the metal, which means more Maillard browning, which means more flavor. The crust forms in 30 seconds. You flip once. The whole burger is done in two minutes.
You cannot do this properly with a spatula. The handle isn’t strong enough, the surface area is too small, and the moment you press hard you bend the spatula. You need a flat, heavy, dedicated tool. That’s what a press is.
The press has to be three things: heavy (1.5+ lbs), flat-bottomed (no ridges), and at least 6 inches in diameter (so a 4-oz ball flattens into a proper 4–5″ patty). Anything else is a marketing toy.
Best smash burger press overall: Cuisinart 6.5″ Cast Iron
The Cuisinart 6.5″ Cast Iron Smash Burger Press is what I’d buy if I were starting over. It’s heavy enough to do the job (just over 2 lbs), flat-bottomed, and has the right diameter for a quarter-pound ball to spread into a proper crispy-edged patty.
The handle is sturdy plastic with a textured grip. Not as pretty as a wood-handled press, but I’m not displaying this thing on a shelf. I’m slamming it onto raw beef. Function over form.
I made eight smash burgers in one session on my Blackstone with this press. Every single one had the lacy, crispy edge you see in the diner-style burger photos. The patty stuck slightly to the press the first two tries, then I figured out to give the press a quick wipe with oil before each smash and the problem went away.
4.7 stars across 18,000+ reviews on Amazon. There’s a reason it’s the bestseller in this category.
Pros
- Heavy enough to smash without leaning into it
- Flat bottom — no ridges, no decorative grooves to clean
- Pre-seasoned cast iron right out of the box
- Sub-$25 most days
Cons
- Plastic handle isn’t beautiful — fine for utility, ugly for gift-giving
- 6.5″ is a hair small for double-quarter-pound smashes; sticks to the patty edges
- Hand-wash only (true of all cast iron)
Who should skip it?
Skip if you’re buying this as a Father’s Day gift and want something pretty. The Lodge presses below have the heritage-cast-iron look. Skip if you’re cooking quarter-pound patties consistently — go to the Bellemain 7″ or Lodge 8″ for more spread room.
Best for big patties: Bellemain 7″ Cast Iron Burger Press
The Bellemain 7″ Cast Iron Smash Burger Press goes a half-inch wider than the Cuisinart, which sounds small but matters when you’re working with a quarter-pound ball. The wider face spreads the meat thinner without you having to angle the press, and you get more crispy edge per burger.
The wood handle is the real upgrade. It stays cool when you’re working over a 500-degree griddle, and it feels good in your hand if you’re smashing six burgers in a row at a cookout. The Cuisinart’s plastic handle gets noticeably warm if you press too long.
I’d put this on a Father’s Day gift list before the Cuisinart specifically because of how it looks. Wood handle, hammered cast iron face — it presents like a $50 tool even though it runs in the mid-$20s.
Pros
- Wood handle stays cooler than plastic
- 7″ face fits quarter-pound balls without overflow on the patty edges
- Heavier than the Cuisinart by a noticeable margin (about 2.5 lbs)
- Looks the part — gift-worthy
Cons
- Wood handle requires more careful cleaning (no submerging)
- Heavier means more arm fatigue if you’re cooking 12+ burgers solo
- Some recent reviews flag inconsistent seasoning out of the box
Who should skip it?
Skip if you’re cooking smaller slider-style burgers — the 7″ face is overkill for 2-oz balls. Skip if you’ve got wrist or grip-strength issues; this thing’s heavy enough that ten burgers in a row will feel it. Skip if you’re going to dishwasher-abuse it; the wood handle won’t survive.
Best brand reputation: Lodge 8″ Round Cast Iron Press
Lodge has been making cast iron in Tennessee since 1896. The Lodge 8″ Round Cast Iron Press is the one most serious cooks will eventually own because Lodge cast iron lasts forever. I’ve got my grandfather’s Lodge skillet from the 1960s and it still cooks better than anything Williams-Sonoma sells today.
The 8″ round press has the spiral cool-grip handle that’s become the Lodge signature. It works. The handle stays meaningfully cooler than other presses I tested, even after the cast iron face has been preheated for ten minutes. The hammered finish on the face is functional too — it gives a tiny bit of grip on the patty so you don’t slide as much when you press.
Where Lodge falls short on this specific tool: the price-to-performance ratio. It’s $25–$30 to the Cuisinart’s $20–$25, and the actual smashing performance is essentially the same. You’re paying for the brand and the long-term durability, which is real but not necessary if you just want a working press.
Pros
- Heritage cast iron quality — will outlast everything else in your kitchen
- Cool-grip spiral handle is genuinely functional
- Pre-seasoned with vegetable oil, no synthetic coatings
- Made in USA
Cons
- $5–$10 premium over equivalent presses for similar smashing performance
- Spiral handle isn’t as comfortable for some grip styles
- Heavier than it needs to be for the smash technique
Who should skip it?
Skip if you’re price-sensitive and want max value — the Cuisinart does the same job for less money. Skip if you don’t care about heritage brands; the smash burger doesn’t know what brand made the press. Skip if you want a wooden handle; this isn’t it.
Bigger Lodge for griddle sessions: Lodge 8″ Round Cast Iron Press
If you’ve got a Blackstone or Camp Chef griddle and you’re cooking for six-plus people regularly, the Lodge 8″ Round Cast Iron Press gives you more surface area for double smashes (where you stack two thin patties for a single burger). 8″ lets you flatten a 5-oz ball to a true 5″ patty with crispy edge all the way around.
It’s the same Lodge build quality as the 8″, just bigger and a few dollars more. For a household that does proper backyard cookouts more than three times a summer, this is the size to get.
Pros
- Larger face for double-smash technique
- Same Lodge durability and cool-grip handle
- Better fit for full-sized quarter-pounders or bigger
Cons
- Most expensive in this guide
- Heavy enough to fatigue your wrist mid-session
- Overkill for sub-3-oz slider patties
Who should skip it?
Skip if you cook for 1–4 people. The 8″ or Cuisinart will do everything you need. Skip if you’re working on a small skillet rather than a griddle — 8″ might not even fit comfortably depending on your pan diameter.
Comparison table
| Product | Price | Best For | Who Should Skip It |
|---|---|---|---|
| Cuisinart 6.5″ Cast Iron Smash Press | ~$20–$25 | Best overall value. 90% of buyers should start here. | Anyone wanting a wood handle or gift-worthy look. |
| Bellemain 7″ Cast Iron Burger Press | ~$22–$28 | Quarter-pound patties. Best as a Father’s Day gift. | Slider-size cooks. Anyone with grip-strength issues. |
| Lodge 8″ Round Cast Iron Press | ~$25–$30 | Buyers who value heritage brands and lifetime durability. | Price-sensitive shoppers. Wood-handle preferences. |
| Lodge 8″ Round Cast Iron Press | ~$28–$32 | Griddle owners cooking for 6+ people regularly. | Solo cooks, slider makers, small-pan setups. |
What you actually need beyond the press
The press is one tool. The smash technique needs three more pieces of gear to work right. If you’re already shopping for one, grab the rest now and skip the disappointment of trying smash burgers with the wrong setup.
A good cast iron skillet or griddle. If you don’t have one, [IMPACT: Sportsman’s Guide — Camp Chef cast iron skillet] is what I’d buy. Camp Chef pans are built like Lodge but typically run $5–$10 less per piece. The Sportsman’s Guide selection rotates — pre-seasoned 12″ is the sweet spot for home use.
Parchment paper squares. Place a 4″ square between the press and the meat for the first smash. Stops the meat from sticking. Don’t use foil — it tears.
A sharp metal scraper. Once that crust forms on the bottom of the patty, you need to scrape it off the griddle, not flip it with a spatula. The crust IS the smash burger. A flat metal bench scraper works better than any spatula. Cuisinart’s smash burger kit includes one if you want everything in one purchase.
Add this all up and you’re under $60 for a setup that will produce restaurant-style burgers for the next decade. The press alone gets you 70% of the way there. The skillet and scraper close the gap.
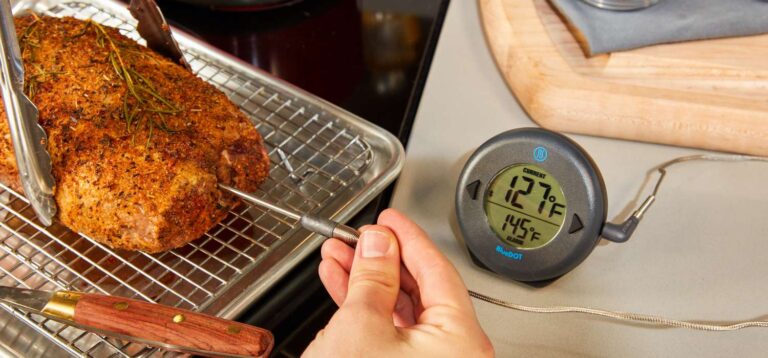
Related: One thing I would not skip: the temperature check. Smash burgers cook fast, and “looks done” is not the same as done. If you don’t already have one, grab a meat thermometer under $25 and stop guessing when the kids are already asking if dinner is ready.
The technique that makes any press work
I burned through about 4 lbs of ground beef figuring this out. Here’s the cheat sheet:
- Get the surface ripping hot. Cast iron skillet on high for 8–10 minutes. The pan should smoke when you flick water on it.
- Don’t pre-form patties. Just roll loose 3–4 oz balls. Squeezing them into pucks ahead of time defeats the whole point.
- Smash within 5 seconds of the meat hitting the pan. Wait longer and the bottom starts to cook before you flatten it.
- Press hard for 10 seconds. Then leave it alone. Don’t keep pressing. You’re done. Walk away.
- Salt only AFTER smashing. Salt before the smash and the salt draws moisture, which keeps the crust from forming.
- Scrape, don’t flip. Slide a metal scraper under the patty. The crust comes with it. That’s the goal.
- Cook the second side for 30 seconds max. Add cheese as soon as you flip. Done.
Total cook time per patty: about 90 seconds. The press is the difference between a thin, crispy, beefy patty and a sad gray hockey puck. Worth every dollar of the $25.
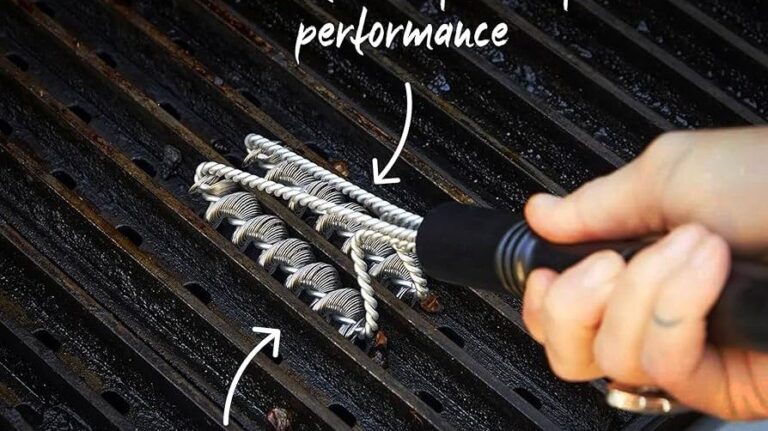
Related: After the burgers come off, clean the grates without dragging loose wire around the next meal. I covered the safer options in my guide to the best bristle-free grill brush for safe grilling, because one cheap tool should not turn a cookout into an ER story.
FAQ
Is a smash burger press worth it for occasional cooking?
If you grill burgers more than four times a year, yes. The press costs less than two takeout burger meals. After a single cookout where the burgers come out crispy-edged and juicy instead of dry, the press has paid for itself in dad-credibility alone.
Can I use a regular spatula instead of a burger press?
Technically yes, practically no. A spatula doesn’t have the weight to flatten a 4-oz ball into a thin patty in one motion, and the handle will bend if you press hard enough. You’ll get inconsistent thickness and lose the crispy-edge effect that makes smash burgers worth eating.
What’s the difference between a smash burger press and a regular bacon press?
Bacon presses tend to be smaller (4–5″), often have textured bottoms (which is fine for bacon, bad for burgers), and are sometimes lighter weight. A smash burger press is purpose-built for the 6″–8″ patty diameter, with a smooth flat bottom and 1.5-lb-plus weight. A bacon press will work in a pinch; a burger press won’t necessarily work for delicate bacon strips. Buy the right tool.
How do I clean a cast iron smash burger press?
Hot water, a stiff brush, no soap (or barely any). Dry it immediately on the stove over low heat. Wipe a thin layer of vegetable oil on the cooking face when it’s still warm. Never put it in the dishwasher and never let it air-dry — that’s how you get rust spots.
Bottom line
If you’re new to smash burgers and want the best value, get the Cuisinart 6.5″ Cast Iron. Twenty bucks. Done. If you want the press to look gift-worthy or you’re cooking quarter-pounders, the Bellemain 7″ with the wood handle is the upgrade pick. If you’re a Lodge loyalist or you grill on a big griddle, go to the Lodge 8″.
Related: This is also one of those gifts that looks better when it is bundled. If you’re shopping for Dad on a deadline, I put the press, thermometer, and other practical picks into a last-minute Father’s Day gifts under $50 list.
Whatever you pick, get the technique right. The tool is half the equation. The other half is the rip-roaring hot pan and the 5-second smash window.